Admin portal: User guide
1. Projects
This section describes the manage projects page of the admin portal.
The manage projects page of the administration portal allows you to create and manage your projects. You can create a new project and define its environments, edit an existing project or delete a project.
1.1. Overview
The projects overview allows you to see the list of existing projects. It shows the title, number of environments and total number of active/completed tasks for each project. By clicking on a project, you can see its description, as well as the number of active/completed tasks per environment.
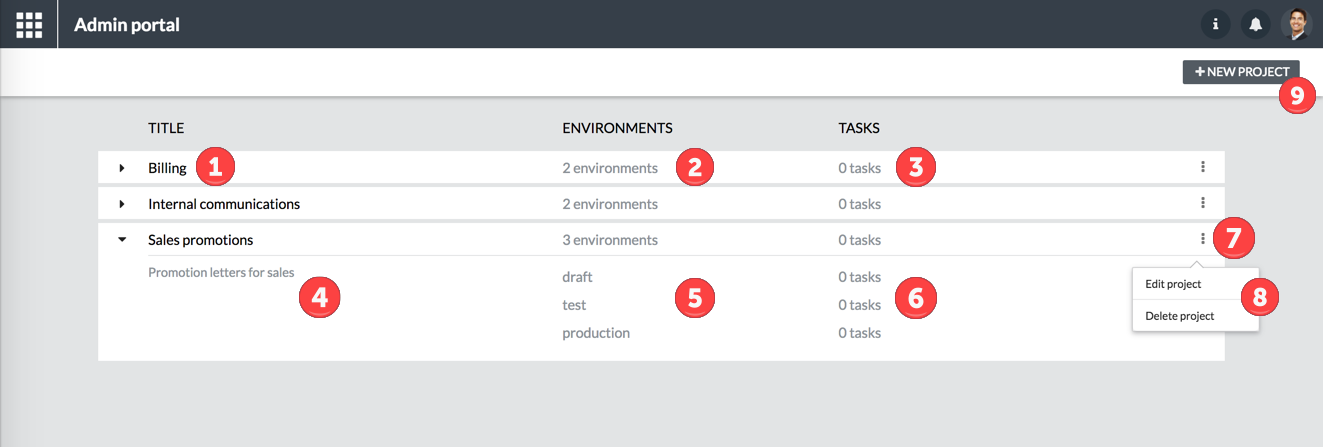
| 1 | Project name |
| 2 | Number of environments |
| 3 | Total number of active/completed tasks |
| 4 | Project description |
| 5 | Environments names |
| 6 | Number of active/completed tasks per environment |
| 7 | More options button |
| 8 | More options menu |
| 9 | New project button |
1.2. Create new project
You can create a new project by clicking the NEW PROJECT button on the right side of the top bar. A wizard will guide you through the creation of the project.
The first step will ask you for a mandatory name and optional description for your project. If there are multiple stores available for your account, you will also be asked to choose one for the storage of your environment data during this step. Click NEXT to proceed.
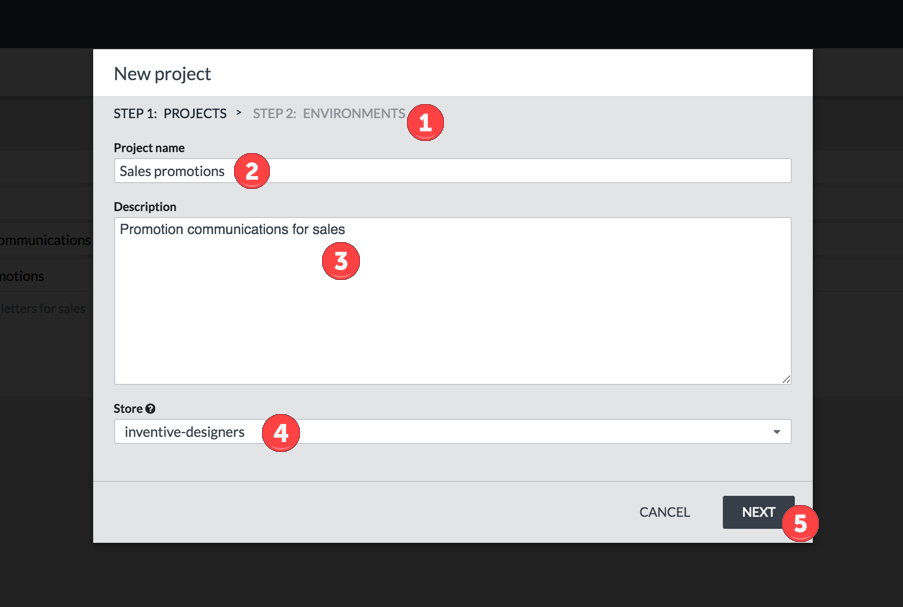
| 1 | Wizard steps |
| 2 | Project name |
| 3 | Project description |
| 4 | Store selection |
| 5 | Next button |
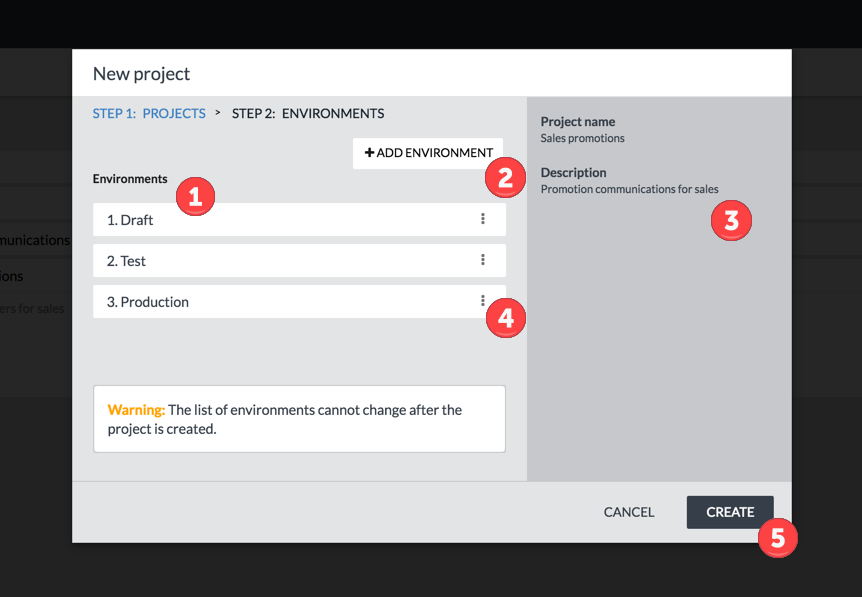
The second step will allow you to define the environments for the project. You can add an environment by entering a mandatory name and base path for the environment. A suggestion comprised of the project name and environment name will be made for the base path, but you can change this manually or by pressing the ellipsis button to browse for a folder. Click the ADD button to add the environment to the list of defined environments for the project. You will then see the list of currently defined environments. You can add more environments by clicking the ADD ENVIRONMENT button and following the same steps as before. To remove an environment click the more options button next to the environment name and click Delete.
|
Environments need to be defined in the correct order and cannot be changed after the project is created. |
| 1 | Environments name |
| 2 | Environment base path |
| 3 | Add environment button |
| 1 | Environments list |
| 2 | Add environment button |
| 3 | Project overview |
| 4 | More options button |
| 5 | Create button |
1.3. Edit project
To edit the name and description of a project, click the more options button on the right side of the project on the project overview page and select Edit project. In the dialog that appears you can change the name and description. Click the UPDATE button to save your changes.
It is not possible to edit the environments for an existing project.
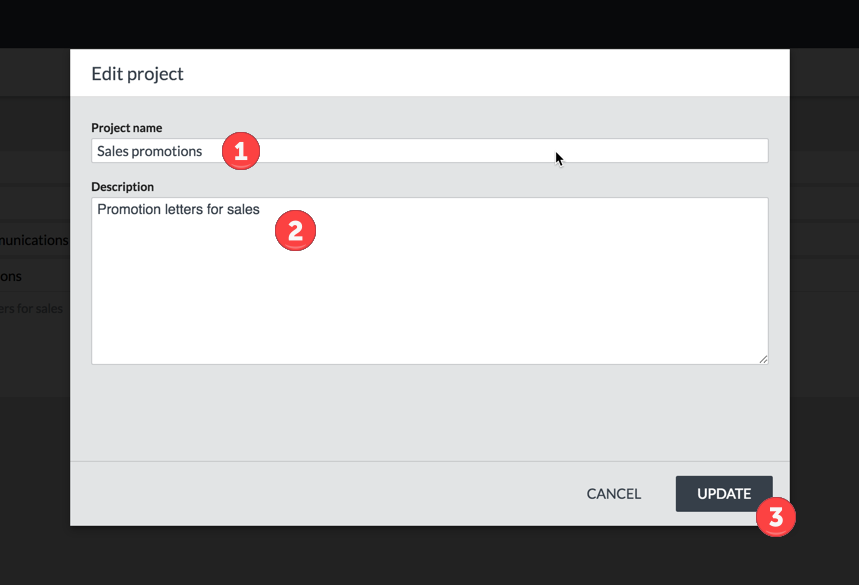
| 1 | Project name |
| 2 | Project description |
| 3 | Update button |
1.4. Delete project
To delete a project, click the more options button on the right side of the project on the project overview page and select Delete project. A dialog will appear asking you to enter the name of the project again as confirmation. Once you’ve entered the name, click the DELETE button to permanently delete the project. The environment’s resources will not be deleted, but all tasks and environment information will be removed. This cannot be undone.
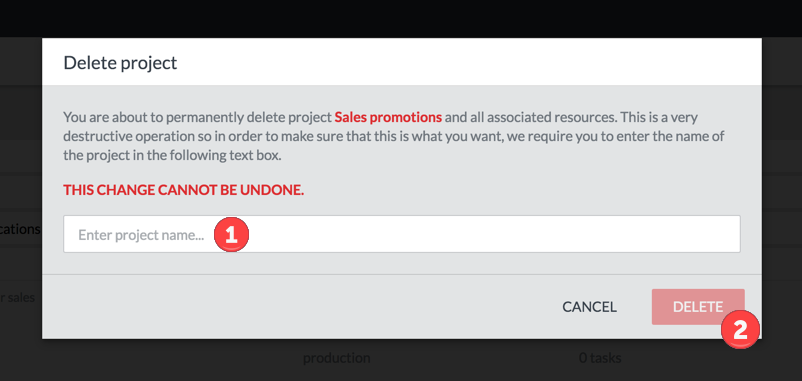
| 1 | Project name |
| 2 | Delete button |